Why You’ll Love This Crusty Italian Bread Recipe
When you take your first bite of this crusty Italian bread, you’ll understand why it’s a staple in so many households.
The delightful crunch of the crust gives way to a soft, airy interior that perfectly complements any meal.
I love how versatile it is; whether you’re slathering butter on a warm slice or using it to soak up a rich sauce, it never disappoints.
Plus, the aroma that fills your kitchen while it bakes is simply irresistible.
It’s more than just bread; it’s an experience that brings family and friends together around the table, creating lasting memories.
Ingredients of Crusty Italian Bread
When it comes to making Crusty Italian Bread, the ingredients are pretty straightforward, but their quality is what makes the bread truly shine. You want to start with the freshest ingredients because, trust me, they make a world of difference.
Think of it like picking out the best tomatoes for a sauce; the better the base, the better the outcome, right? So, let’s gather what we need before we get our hands a little messy with dough.
Here’s what you’ll need to whip up this delightful loaf:
- 4 cups all-purpose flour
- 1 ½ cups warm water (about 110°F)
- 2 teaspoons salt
- 2 teaspoons sugar
- 1 packet (2 ¼ teaspoons) active dry yeast
Now, let’s talk a little more about these ingredients. The flour is the backbone of our bread, so opting for all-purpose flour gives you that perfect balance of structure and softness.
If you’re feeling adventurous, you could even try bread flour for a chewier texture. And don’t skimp on the salt; it’s not just for flavor but also helps control the yeast’s activity, making sure your dough rises just right.
As for the yeast, make sure it’s fresh; old yeast can lead to sad, flat bread—a real tragedy in the world of baking. And while warm water is essential, be careful not to make it too hot, or you’ll end up with a yeast funeral instead of a bubbly dough.
How to Make Crusty Italian Bread
Alright, let’s explore the fun part—making that delicious Crusty Italian Bread. First things first, grab a large mixing bowl and combine 4 cups of all-purpose flour with 2 teaspoons of salt and 2 teaspoons of sugar.
Now, here’s where the magic happens: in a separate small bowl, mix 1 packet (that’s about 2 ¼ teaspoons) of active dry yeast with 1 ½ cups of warm water (aim for around 110°F, just warm enough to give the yeast a cozy little bath). Let it sit for about five minutes until it gets all frothy and bubbly. It’s like a mini science experiment, and honestly, who doesn’t love a little fizz?
Once your yeast is all excited, pour it into the bowl with the flour mixture. Mix it all together until a shaggy dough forms. And I mean shaggy—think of that one friend who never quite has their life together.
Then, it’s time to get your hands in there. Flour your countertop lightly, and turn the dough out. Knead it for about 8-10 minutes. If you’ve never kneaded dough before, it might feel a bit awkward at first, like trying to dance at a party when you have two left feet. But trust me, you’ll get the hang of it. The goal is to develop that gluten, so your bread can rise beautifully. The dough should be smooth and elastic when you’re done. If it’s too sticky, sprinkle a bit more flour; if it’s too dry, a splash of water will do.
Now, shape the dough into a ball and place it in a greased bowl, covering it with a damp towel. This is the “resting phase,” where the dough gets to chill and rise for about an hour or until it doubles in size. This part is important—the dough needs that time to develop flavor and structure.
After it rises, gently punch it down (yes, you read that right; you get to punch your dough) to release the air. Then shape it into a loaf or divide it into smaller pieces if you prefer. Place it on a baking sheet lined with parchment paper, cover it again, and let it rise for another 30 minutes. Preheat your oven to 450°F during this time, because we want it nice and hot for that crusty finish. Just like when you’re getting ready for a big date, you want everything to be just right.
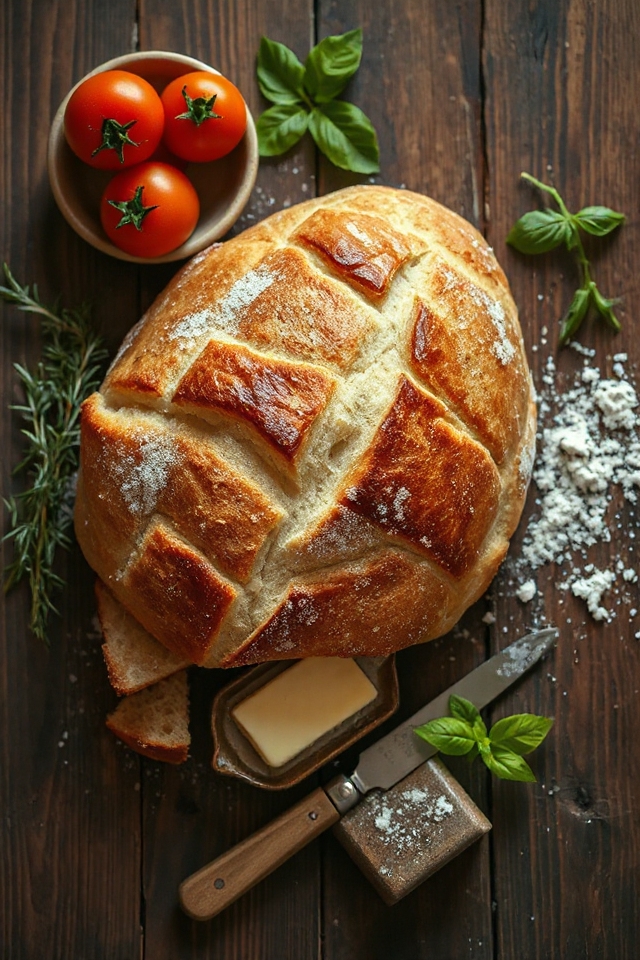
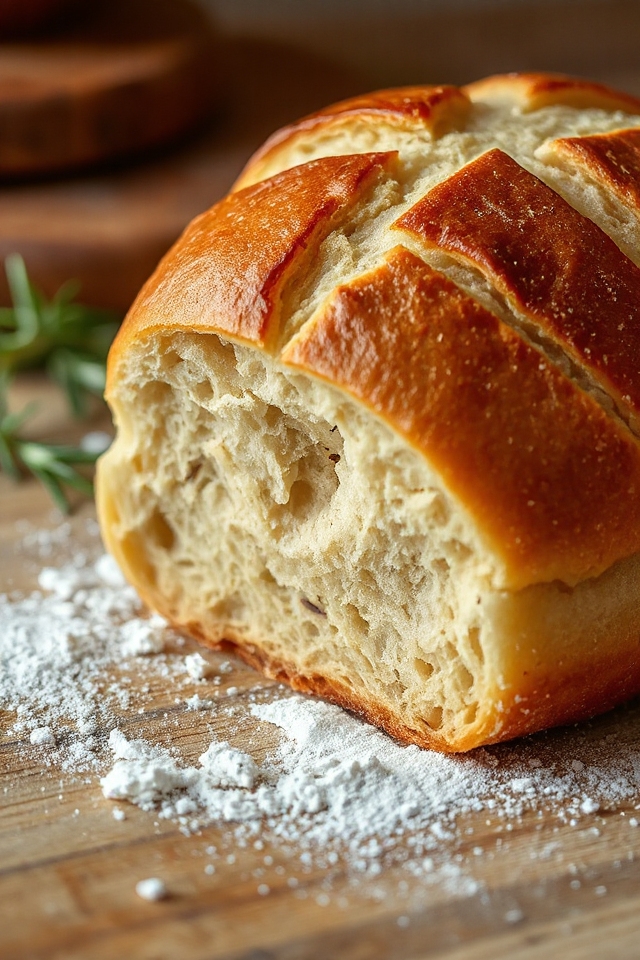
Once that dough is ready, make a few slashes on top with a sharp knife—this helps with the steam escape and gives it that artisan look. Bake for about 25-30 minutes or until it’s golden brown and sounds hollow when you tap on the bottom.
Let it cool, but not for too long, because who can resist warm, crusty Italian bread? Enjoy it fresh, slathered with butter, or alongside your favorite pasta dish. You’ve earned it. Happy baking!
Crusty Italian Bread Substitutions & Variations
While I love the classic Crusty Italian Bread recipe, there are plenty of substitutions and variations to make it your own.
For a nutty twist, try adding a bit of whole wheat flour or substituting half of the flour with bread flour for extra chewiness. You can also mix in herbs like rosemary or oregano for added flavor.
If you’re feeling adventurous, incorporate olives or sun-dried tomatoes into the dough.
Want a sweeter option? Add a touch of honey or sugar.
Experimenting with these variations can lead to delightful surprises, keeping your baking fresh and exciting!
What to Serve with Crusty Italian Bread
Although Crusty Italian Bread is delightful on its own, it truly shines when paired with various accompaniments.
I love serving it alongside a rich olive oil and balsamic vinegar for dipping. It’s also fantastic with a spread of creamy butter or a zesty garlic aioli.
For a heartier option, I often enjoy it with homemade soups, like minestrone or tomato basil.
If I’m feeling indulgent, a selection of cured meats and cheeses makes for a perfect charcuterie board.
Finally, topping it with fresh bruschetta or a savory tapenade always elevates the experience.
Enjoy exploring these delicious pairings!
Additional Tips & Notes
To guarantee your Crusty Italian Bread turns out perfectly every time, I recommend a few key tips.
First, use high-quality flour for the best texture and flavor.
Don’t skip the resting periods; they’re essential for developing gluten.
I also suggest using a baking stone if you have one, as it helps create that perfect crust.
For an extra crunch, spritz the oven with water just before baking.
Finally, let your bread cool completely on a wire rack before slicing.
Trust me, resisting the urge to cut it too soon will be worth it for that perfect crust!